Configuring Work Planner Settings
Objective: Gain an understanding of work plan settings and how to configure them.
NOTE This step is best performed after importing Data Sources.
In the Work Planner pane, navigate to the "Settings" tab and click on it. In the "Work Plan Settings" page, there are a series of tabs, allowing users (as an administrator) to set projects details.
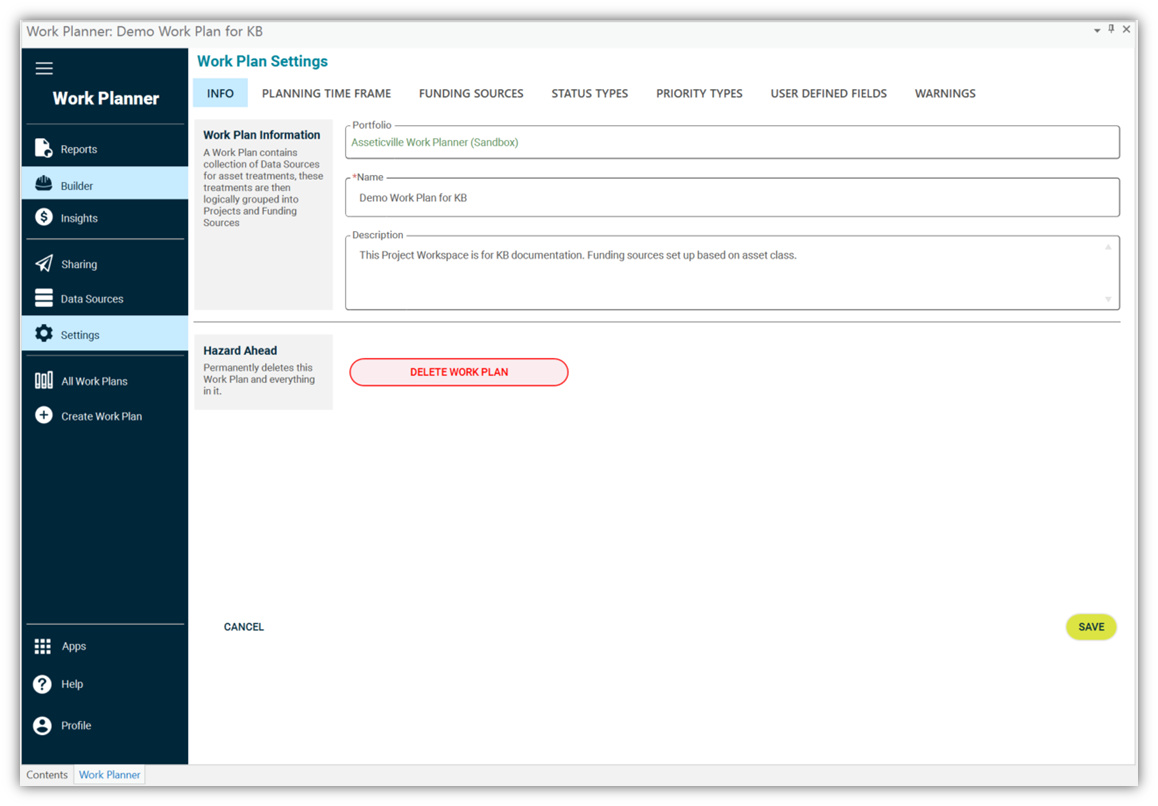
Info
In this page, you can view the associated Predictor Portfolio, set the Work Plan name, and edit the project description. Users who are members of the Portfolio with Administrator rights can also delete the Work Plan here.
For more information about the plan administration such as "Delete Work Plan", please see the "Work Plan Management" article.
Planning Time Frame
In this page, set the planning start date and duration, then "Save".
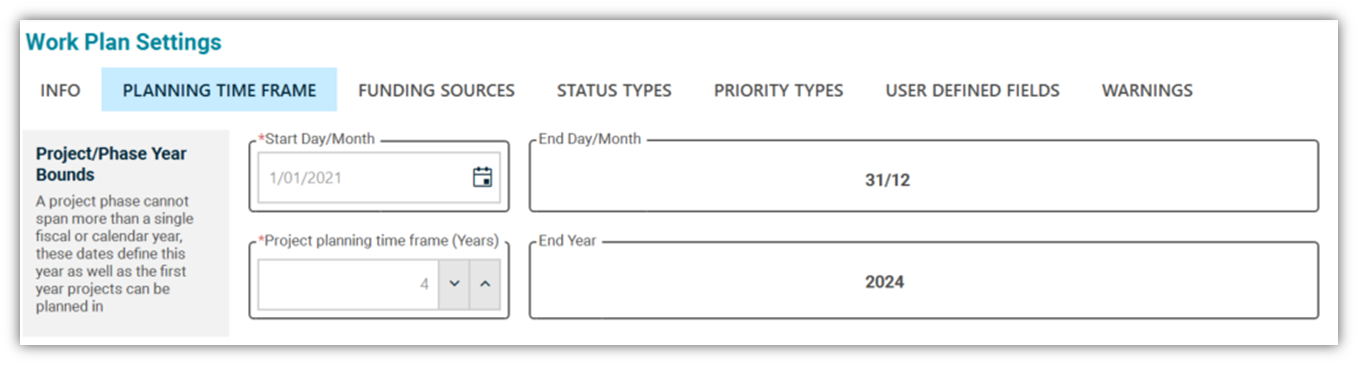
Note: Any future changes to the plan's start and end dates will affect the configured funding sources and consequently, the projects.
Funding Sources
Users can assign multiple funding sources to each phase of the project. Use the grid provided here to configure the funding sources and their year-on-year available budget. You can also modify/delete a funding source in this page if you have the required privileges.
- Click on the "ADD FUNDING SOURCE" to add available funding sources of the plan, then populate each field with the approved funding values for that year. Depending on how funding sources are distributed and spent in your organization, you can define funding sources appropriately.
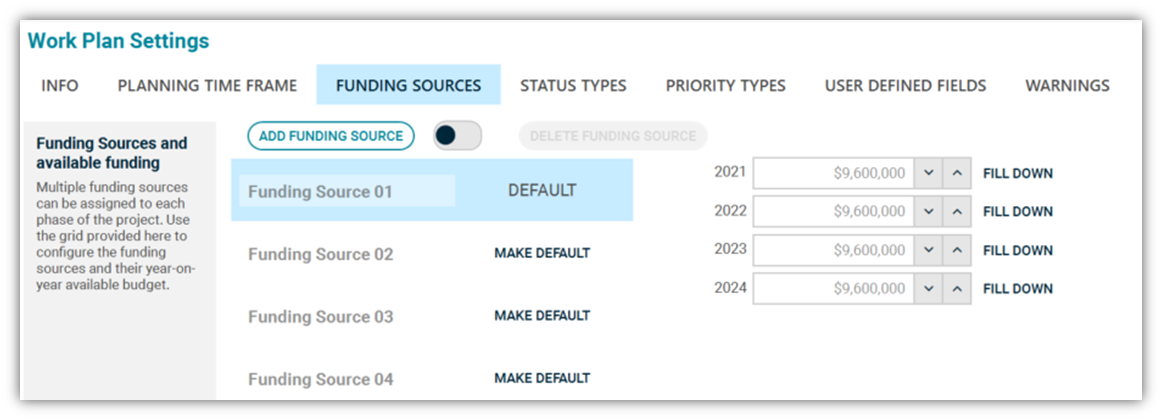
Users can rename automatically generated names to appropriate names. As an example, for a council in Australia, the "Funding Sources 01" can be renamed to "Council Cash, the "Funding Sources 02" can be renamed to "Grants" and the "Funding Sources 03" can be renamed to "Community Contributions".
If applicable, select the primary funding source as "Default", so that it will be the initial funding source of each project (e.g. Funding Sources 01 or Council Cash in the above example).
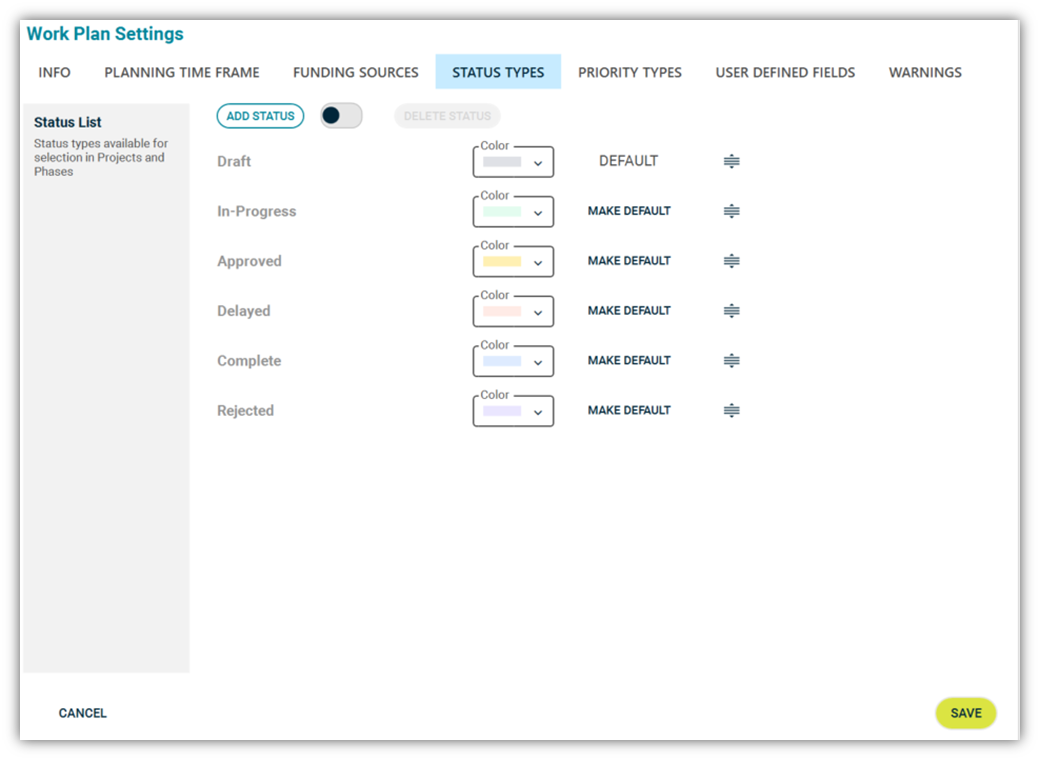
Status Types
In this page, you can define/modify/delete the project status types based on the organization's projects' status definitions. Some examples have been provided below. Click on "ADD STATUS" to add your preferred project status, choose the desired color, determine default status, then "Save" the settings.
Priority Types
In this page, you can define/modify/delete the project priority types based on the organizations' project priority types definitions. Click on "ADD PRIORITY" to add your preferred priority type, choose the desired color, determine default priority, then "Save" the settings. The priority field is a ranking value that you can define to allocate and apply to each project in your Work Plan.

User-Defined Fields
In this page, you can modify/define/delete your specific fields as they relate to the Project. Click on "ADD UDF FIELD" to add your preferred custom field, determine the field's data type (e.g. String, Integer, Double, Date) and define in which level of the Project (Project or Phase) the custom field is applicable, then "Save" the settings.

The custom fields provide transparency and integration during the asset planning phase. These fields are generally used to help documentation and recording of the key planning's decision-making criteria such as justification, timing and particular funding source. They can also be used by internal stakeholders to add their feedback and comments during the plan review process.
Examples are provided in the "Create Project Packages" section.
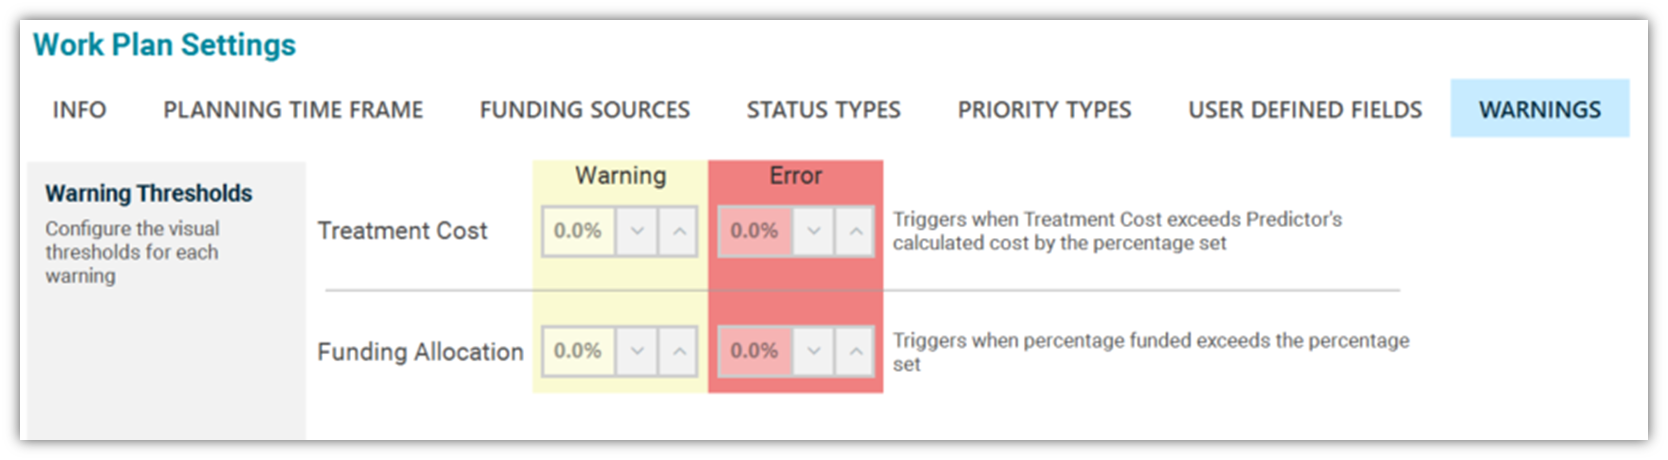
Warnings
In this page, you can configure warnings for treatment costs and funding allocations. When the treatment cost and funding allocations are above or below the thresholds that have been defined by your organization as being acceptable, the warnings will be triggered, and the field will change color.
At this stage, your work plan template is ready. You can start creating your Work Plan by building projects with Builder.
